Installing curtains might seem like a straightforward task, but getting it right can transform the entire look and functionality of a room. Whether you're working with lightweight sheers or heavy blackout, velvet, or acoustic fabrics, proper installation ensures smooth operation, optimal light control, and a polished appearance. This comprehensive guide walks you through every step—from measuring and choosing hardware to mounting and caring for your curtains—so you can achieve professional results in any space.
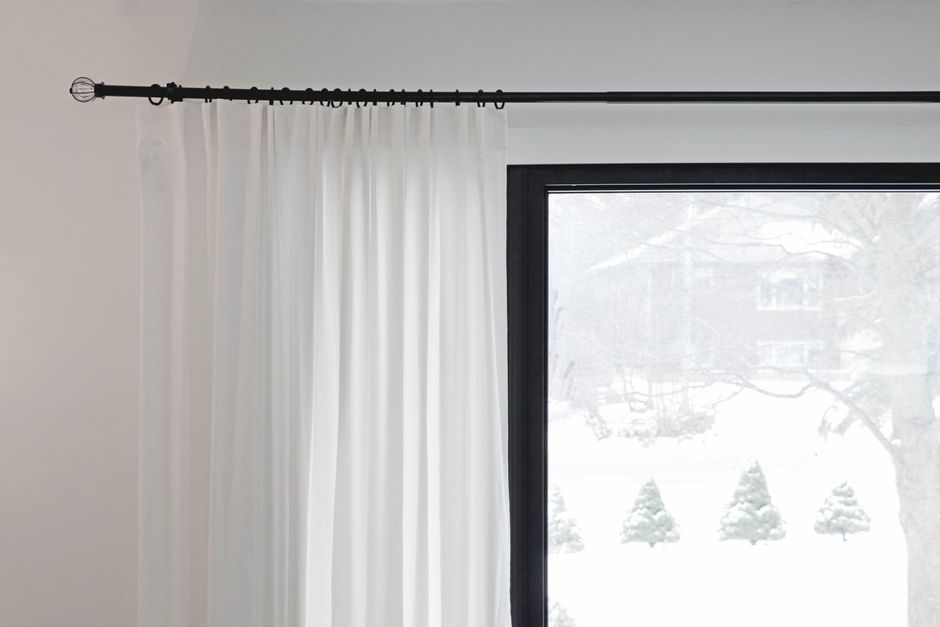
Why Proper Curtain Installation Matters
Curtains are not just decorative; they play a crucial role in privacy, light management, insulation, and even acoustics. A poorly installed curtain rod can sag under the weight of heavy velvet curtains, or an improperly mounted track can cause sheers to bunch and snag. Moreover, for specialized curtains like blackout or acoustic panels, an airtight fit is essential to block light or deaden sound. Taking the time to install curtains correctly ensures your investment performs as intended and lasts for years.
___PROTECTED_1___
Tools and Materials You'll Need
Before you start, gather all the necessary tools and supplies. Having everything on hand minimizes interruptions and allows for a smooth workflow. Here is a checklist:
- Measuring tape (steel tape measure preferred for accuracy)
- Pencil or chalk for marking
- Spirit level to ensure straight alignment
- Electric drill with appropriate drill bits (masonry bits for concrete or brick)
- Screwdrivers (Phillips and flathead)
- Stud finder (for locating wall studs)
- Curtain rod or track system
- Curtain brackets and screws (check weight rating)
- Wall anchors if drilling into drywall
- Curtain rings or hooks (depending on header style)
- Step ladder
___PROTECTED_2___
Measuring Your Windows Correctly
Accurate measurement is the foundation of a successful curtain installation. Even a few centimeters off can result in curtains that are too short or leave gaps around the edges. Follow these guidelines for both inside and outside mounts.
Width and Height Measurements
For the width, measure the window frame, then decide if you want the curtain to cover only the glass or extend beyond the frame. For a standard outside mount, add 8–12 inches (20–30 cm) to the window width to allow the curtains to stack fully to the sides when open. This gives you a clear view and lets in maximum light. For height, measure from the chosen mounting point to where you want the bottom edge to end. Common options: sill length, apron length, or floor length. For a dramatic look, install the rod 4–6 inches above the window frame and extend it 3–6 inches beyond the frame on each side.
Measuring for Different Mount Types (Inside vs Outside)
Inside mount – The curtain hangs inside the window frame, like roman shades. Measure the exact inside width at the top, middle, and bottom; use the narrowest measurement. Also measure the inside height at multiple points. Ensure there is enough depth for the hardware.
Outside mount – The curtain hangs outside the frame, giving the illusion of a larger window. Measure the full width and height of the frame, then add extra as described above. Always recheck level at the intended rod height.
Choosing the Right Curtain Hardware
The hardware must match both the weight and style of your curtains. Heavy fabrics like velvet or acoustic materials require sturdier rods and brackets, while sheers can be installed on lighter tension rods or decorative rods.
Curtain Rods vs. Tracks
Rods are the most common choice for decorative curtains. They come in various materials (wood, metal, plastic) and diameters (usually 1 to 2 inches). Rods are best for medium to heavy curtains when properly supported.Tracks are more discrete and often used for ceiling-mount installations or for heavy curtains that require smooth gliding. Tracks are excellent for blackout curtains because they can be mounted with a return to the wall, eliminating light leakage along the edges.
Weight Considerations for Heavy Fabrics (Velvet, Acoustic)
Velvet and acoustic curtains are significantly heavier than standard cotton or polyester. A standard curtain rod may bow or pull away from the wall if not rated for the weight. Consider the following guide:
| Fabric Type | Approx. Weight | Recommended Hardware |
|---|---|---|
| Sheer | 0.5–1 lb per panel | Standard rod or tension rod |
| Blackout (lined) | 2–3 lb per panel | Sturdy rod with center support |
| Velvet | 3–5 lb per panel | Heavy-duty rod with reinforced brackets |
| Acoustic | 5+ lb per panel | Industrial track or ceiling-mounted track |
Step-by-Step Installation Process
Follow these steps carefully to achieve a secure and professional installation.
Step 1: Mark and Level the Mounting Points
Using your measurements, mark the positions for the brackets with a pencil. Hold a spirit level across the marks to ensure they are perfectly horizontal. If you are mounting multiple brackets, make sure they are evenly spaced. For long rods, add a center support bracket to prevent sagging.
Step 2: Install Brackets
If you are drilling into drywall, use a stud finder to locate studs for maximum support. If no stud is available, insert wall anchors rated for the weight of your curtains. Drill pilot holes, then screw the brackets in place. Verify each bracket is secure by tugging gently.
Step 3: Hang the Rod or Track
Place the rod or track onto the brackets and ensure it snaps or locks in place. If you're using rings, slide them onto the rod before setting it in brackets. For tracks, mount the gliders and hangers first, then attach the track to the ceiling or wall brackets.
Step 4: Attach Curtains and Adjust
Hang your curtains onto the rod using rings, hooks, or a rod pocket. Start from the center and work outward to avoid bunching. Once all panels are in place, pull the curtains open and closed to check for smooth movement. Adjust the stack, ensure the hem is even, and check that the bottom just skims the floor or windowsill as desired.
Installation Tips for Specific Curtain Types
Different curtain fabrics and functions require a tailored approach. Here’s how to handle the most popular types you'll encounter.
Blackout Curtains
The primary goal is to block light completely. Use a track or rod that allows the curtain to fit flush against the wall. Install outside mount and make the curtain overlap the window frame by at least 4 inches on each side and top. Use a roman shade or valance to cover the top gap if necessary. Always use a sturdy rod with a center bracket because the lining adds weight.
Sheer Curtains
Sheers are lightweight and meant to diffuse light, not block it. Use a tension rod for a no-drill inside mount, or a decorative rod for an outside mount. Avoid tightly pulling the sheers; they should hang naturally. Since sheers are delicate, ensure the rod has smooth finials to prevent fabric snags. Use clip rings designed for light fabrics.
Velvet Curtains
Velvet adds elegance but brings challenges. The fabric is heavy and prone to creasing. Use a heavy-duty rod with a diameter of at least 1.5 inches and install support brackets every 24–36 inches. Never drag fabric on the floor during installation; fold and lift it into place. Use a steamer to remove any wrinkles after hanging.
Acoustic Curtains
Acoustic curtains are designed to absorb sound and are extremely heavy. They require ceiling-mounted tracks or industrial-grade rods. When installing, ensure the track can glide even with the added weight. Incompatible hardware can lead to premature wear and sagging. Professional installation is highly recommended unless you have experience with heavy loads.
Common Installation Mistakes to Avoid
- Hanging too narrow – Curtains that are too narrow for the window leave light gaps and ruin the visual balance. Always add extra width.
- Ignoring weight limits – Overloading brackets can cause them to pull out of the wall. Check the diameter and manufacturer rating.
- Incorrect mount height – Mounting too close to the window can make ceilings feel lower. Raise the rod to create height.
- Skipping a level – Uneven brackets cause curtains to hang crooked.
- Forgetting to wash hands – Oils and dirt from your fingers can stain light-colored fabrics like sheers.
- Not allowing for floor clearance – For floor-length curtains, leave at least 1/4 inch gap to prevent dragging and dust collection.
Post-Installation Care and Adjustments
Once your curtains are up, spend a few minutes adjusting them for a flawless look. Pull them closed and ensure both panels meet evenly in the middle. If you notice any catching or sticking, adjust the rings or hooks. Over the next few days, fabric may relax and stretch—recheck the length and adjust as needed. For heavy curtains, periodically check screws and brackets for any loosening and retighten if necessary.
Proper installation is key to enjoying the full benefits of your curtains, whether they are luxurious velvet, functional blackout, airy sheer, or sound-blocking acoustic. By following this guide, you’ll ensure your window treatments are secure, elegant, and long-lasting. Now that you know the techniques, why not take on your next curtain installation project with confidence?