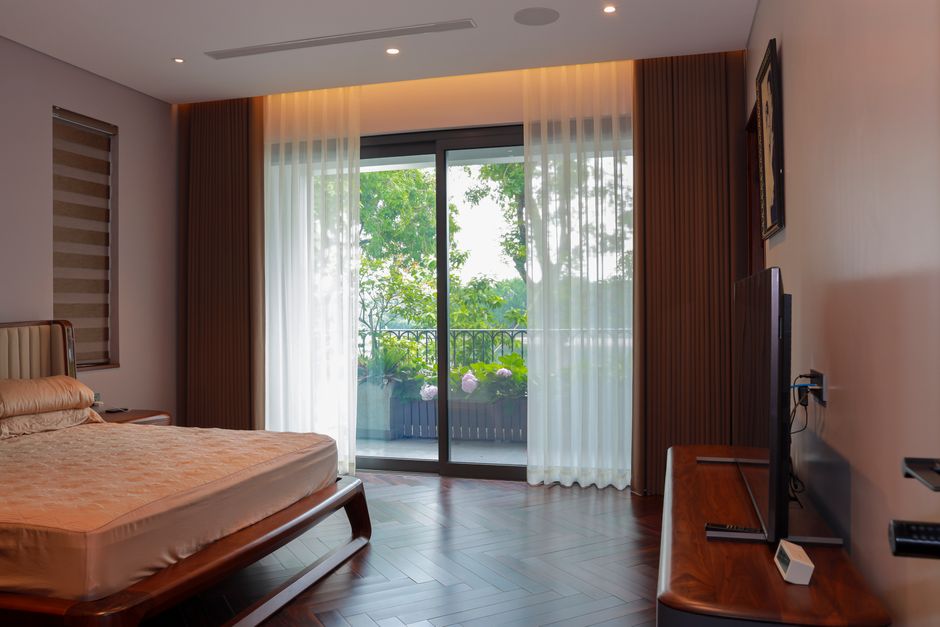
Introduction to Acoustic Curtain Installation for Sliding Doors
Sliding doors are a common source of noise leakage in homes and offices. Acoustic curtains can significantly reduce sound transmission while also providing thermal insulation and light control. Installing them correctly on sliding doors requires careful planning and the right hardware. This guide covers everything from measuring to mounting, ensuring your acoustic curtains perform at their best.
___PROTECTED_1___
Why Acoustic Curtains for Sliding Doors?
Sliding doors often have large glass panels and gaps that let in noise. Acoustic curtains are made from dense, multi-layer fabrics (e.g., velvet, blackout materials) that absorb and block sound waves. They can reduce noise by up to 20–30 dB. Additionally, they help with temperature regulation and privacy.
___PROTECTED_2___
Tools and Materials You'll Need
Before starting, gather the following:
- Acoustic curtain panels (at least 2x width of door for proper gathering)
- Heavy-duty curtain rod or track system (ceiling-mounted recommended for sliding doors)
- Wall anchors (if not drilling into studs)
- Drill, screwdriver, level, measuring tape, pencil
- Curtain rings or hooks (if using a rod)
- Optional: blackout lining or thermal backing
Step 1: Measure Your Sliding Door Area Accurately
Precise measurements are crucial. Follow these guidelines:
- Width: Measure the total width of the door frame from left to right. For maximum sound blocking, the curtain should extend 6–12 inches beyond the frame on each side. Multiply the final width by 1.5 to 2 for proper fullness.
- Height: Measure from the top of the door frame to the floor. For a floor-length look, add 1 inch to avoid dragging. If mounting above the frame, measure from the desired rod position to the floor.
- Overlap: For sliding doors, the curtain should fully cover the track when closed. Consider using a single panel that can be drawn to one side, or two panels that meet in the middle.
Step 2: Choose the Right Mounting System
Ceiling-Mounted Track Systems
For sliding doors, a ceiling-mounted track is ideal. It allows the curtain to hang flush with the door, minimizing gaps. Choose a track that can support the weight of acoustic curtains (often up to 10–15 lbs per panel).
Wall-Mounted Rods
If ceiling mounting isn't possible, use a heavy-duty rod with brackets installed above the door frame. Ensure the rod extends at least 6 inches past the frame on each side. Use a rod with a diameter of at least 1.5 inches to prevent sagging.
Step 3: Install the Track or Rod
Follow these steps for a secure installation:
- Locate studs or use anchors: Use a stud finder to locate ceiling joists or wall studs. If not available, use heavy-duty wall anchors (rated for at least 50 lbs).
- Mark positions: For a track, mark the screw holes along the ceiling, centered over the door. For a rod, mark bracket positions on the wall, ensuring they are level.
- Drill pilot holes: Use a drill bit slightly smaller than your screws. Drill into studs or insert anchors.
- Mount brackets/track: Secure with screws. For tracks, snap the track into the brackets or screw directly. For rods, attach brackets and then place the rod.
- Check level: Use a level to ensure the rod or track is perfectly horizontal.
Step 4: Hang the Acoustic Curtain Panels
Now it's time to hang the curtains:
- Attach rings or hooks: If using a rod, slide rings onto the rod before hanging panels. For tracks, use gliders or hooks that come with the system.
- Hang panels: Start from the center or one side, attaching each ring/hook to the curtain header. Ensure the fabric falls evenly.
- Adjust fullness: Pleat the fabric manually for a uniform look. Acoustic curtains are heavy, so take care not to strain the fabric.
Step 5: Seal Gaps for Maximum Acoustic Performance
Even small gaps reduce sound blocking. Use these tips:
- Floor gap: Ensure curtains touch the floor or use a weighted hem. Some acoustic curtains have built-in weights.
- Sides: Install side tracks (J-channels) or use magnetic tapes to seal the edges of the curtain against the wall or door frame.
- Overlap: For double panels, ensure they overlap by at least 4 inches in the center.
- Top: Use a valance or cornice to cover the top gap between the rod/track and the curtain.
Practical Tips for Sliding Door Acoustic Curtains
- Fabric selection: Choose curtains with high STC (Sound Transmission Class) ratings. Multi-layer fabrics like velvet or thick blackout materials work best.
- Weight support: Acoustic curtains are heavy. Ensure your rod or track is rated for the total weight. Use center supports for long spans.
- Sliding door operation: If you need access to the door, consider a curtain that can be drawn completely to one side. Use a tie-back or holdback to keep it open.
- Layering: Combine acoustic curtains with a sheer curtain on a separate rod for light control during the day while maintaining some sound absorption.
Maintenance and Care
To keep your acoustic curtains effective:
- Dust regularly: Use a vacuum with a brush attachment on low suction.
- Spot clean: For stains, use a mild detergent and cold water. Do not machine wash unless labeled.
- Avoid direct sunlight: Prolonged UV exposure can degrade fabric. Use a lining if necessary.
- Check hardware: Tighten screws every few months to maintain stability.
Conclusion
Installing acoustic curtains on sliding doors is a rewarding DIY project that improves comfort and privacy. By following these steps—accurate measuring, choosing the right hardware, and sealing gaps—you can achieve professional-grade sound reduction. Remember to prioritize heavy-duty components and proper installation for long-lasting results. For best performance, pair your curtains with other acoustic treatments like weatherstripping around the door.