1. Understand the Benefits of Layering
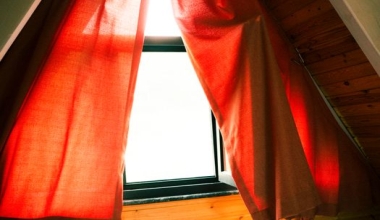
Layering sheer and blackout curtains is a smart design strategy that combines aesthetics with functionality. By placing a lightweight, translucent sheer panel behind or in front of a thicker blackout curtain, you gain the ability to control light and privacy with precision. During the day, you can close the sheers to diffuse harsh sunlight while maintaining a soft, airy glow and outside views. At night, draw the blackout layer to block out streetlights and create a dark, serene sleep environment.
Beyond light control, layering adds depth and texture to your windows. The interplay between the delicate sheer fabric and the dense blackout material creates visual interest, making your windows a focal point. Additionally, this method improves insulation: the air gap between layers helps regulate room temperature, reducing heating and cooling costs. For those with allergies, sheers can trap dust before it enters the room, while blackout curtains block outdoor pollutants.
Finally, layered curtains offer flexibility for different activities—from movie nights requiring complete darkness to reading nooks needing soft daylight. They also protect your furniture from UV fade by filtering sunlight without sacrificing brightness.
2. Choose the Right Sheer Curtain
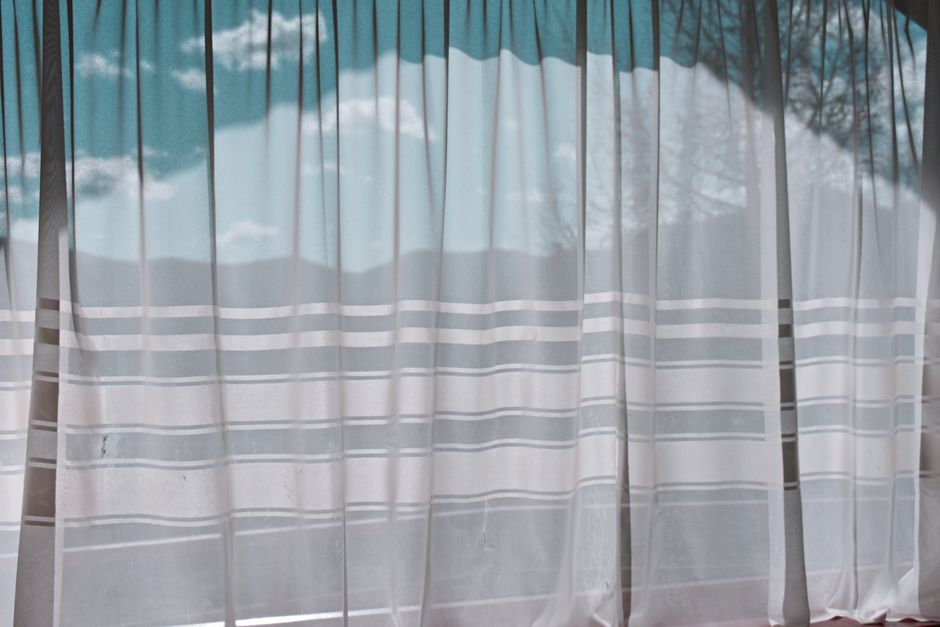
Selecting the ideal sheer curtain is crucial for a successful layered look. Sheer fabrics come in various materials—polyester, linen, cotton, or blends. Polyester sheers are affordable, wrinkle-resistant, and easy to clean, making them a popular choice. Linen or cotton sheers offer a natural, organic feel but require more care. Consider the room’s purpose: for a bedroom, opt for tighter weaves that offer more privacy; for a living room, looser weaves create an ethereal effect.
Color is another key factor. White and ivory sheers are classic, brightening the space and making it feel larger. Neutral tones like beige or gray blend seamlessly with most decor. For a bold statement, colored sheers (e.g., pale blue or blush) can introduce a subtle hue when backlit. Match the sheer’s hem length to your blackout curtains—floor-length panels create a cohesive line, but puddling can add romance. Grommet or rod-pocket tops are common; ensure they slide easily on your chosen rod.
Remember, the sheer should be slightly wider than the window to allow full coverage when closed. A common rule is 1.5 to 2 times the window width. Also, consider the opacity: some sheers offer a “daylight privacy” level where you can see out but outsiders see only shadows.

3. Select the Perfect Blackout Curtain
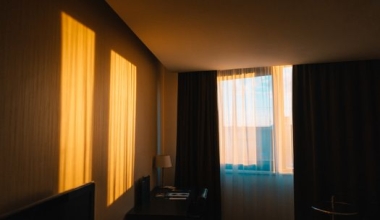
The blackout layer is the workhorse of the duo. True blackout curtains are made from multiple layers or coated fabrics that block 99% of light. Look for dense materials like polyester with foam backing or sueded cloth. Velvet blackout curtains are an excellent option—they provide superior light blockage, add luxury, and absorb sound. Acoustic curtains can further reduce noise if you live in a busy area.
When choosing blackout curtains, prioritize insulation and ease of maintenance. Thermal-lined blackout curtains help keep rooms cool in summer and warm in winter. Opt for machine-washable options if possible, but check care labels—some blackout linings require dry cleaning. Color selection matters: dark shades like navy, charcoal, or black create maximum darkness, while lighter neutrals like cream or light gray can still block light effectively with proper lining. Consider your room’s color scheme and the mood you want.
Fit is critical: blackout curtains should be wide enough to overlap the window frame, typically extending 4-6 inches beyond each side, and long enough to brush the floor or sill. Install the rod as high as possible to make the ceiling seem taller. Ensure the blackout panel is slightly wider than the sheer to avoid light gaps at the edges.
4. Consider Rod Type and Stacking
Your rod choice determines how the layers function. A double curtain rod is the most common solution—it features two parallel rods on one bracket, allowing you to hang sheers on the inner rod and blackout curtains on the outer rod. This setup lets each layer move independently. Alternatively, a single rod with two sets of rings can work if you stack the sheers behind the blackout curtains, but they will slide together.
For a sleek look, consider a traverse rod with separate cords. If you want semi-permanent layering, you can mount two separate single rods—one close to the window for sheers and another farther out for blackout curtains. This adds depth but requires more wall space. Decorative finials and ends can enhance the style. For a minimalist approach, use a single rod with rings and clip-on rings for the sheer, stacking the blackout panel on top.
Stacking space is often overlooked. Measure how much space the curtains take when fully open. Sheers typically stack 1/3 of the width; blackout curtains may stack 1/2. Ensure there is wall space on either side of the window to accommodate the stack without blocking the glass. Typically, add 6-12 inches beyond the window on each side.
5. Master the Art of Hanging
Proper installation ensures your layered curtains look professional and function well. Start by mounting the brackets at the desired height. For a standard 8-foot ceiling, hang the rod 1-2 inches below the ceiling or crown molding to create height. The rod should extend 6-12 inches beyond the window frame on each side to allow curtains to stack without covering the glass. Mark bracket locations with a level.
When hanging, start with the sheer curtain on the innermost rod closest to the window. Then add the blackout curtain on the outer rod. This order allows the sheer to diffuse light naturally while the blackout blocks it. If you want the sheer to be visible when blackout is closed, reverse the order—but this may create light gaps. Adjust the hem lengths: both layers should ideally touch the floor (or hover 1/2 inch above) for a unified look. Use curtain weights at the bottom to help them hang straight.
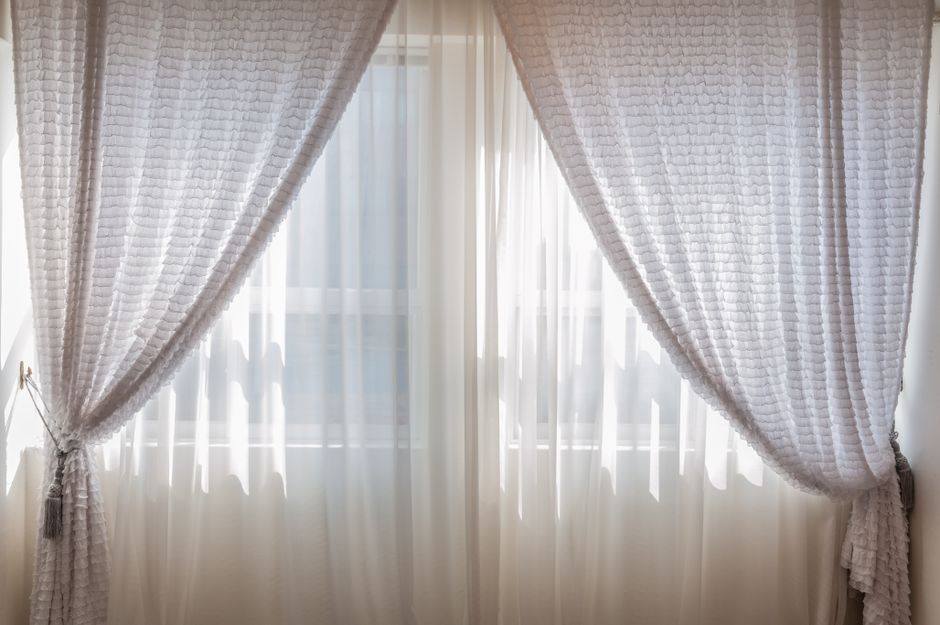
Finally, test the draw. Both layers should slide smoothly. If the blackout curtain is heavy, consider a motorized system for ease. For a tidy look, use tiebacks or holdbacks to drape the curtains gracefully when open.
6. Layer Colors and Textures for Style
Color coordination between sheers and blackout curtains can transform a room. Monochromatic schemes—like white sheers with cream blackout—create a calm, airy atmosphere. For contrast, pair a neutral sheer with a bold blackout color, such as grey sheers with navy blue blackout panels. This adds drama and depth. Texture also plays a role: a smooth sheer against a ribbed or nubby blackout fabric creates tactile interest.
Patterns can be used strategically. A subtle stripe or geometric pattern on the blackout curtain can be balanced by solid sheers. Conversely, if you choose patterned sheers (e.g., floral or abstract), keep the blackout solid to avoid visual chaos. The key is to have a common color thread that ties both layers together. Consider the room’s existing palette—pull a secondary color from your walls or furniture for the blackout curtain.
Don’t forget about the back side of the blackout curtain. If the reverse is visible from inside (e.g., when drawn to the side), choose a fabric that looks good from both sides. Many blackout curtains have a white backing, which can be unattractive; opt for lined ones with the same color on both sides or use a decorative rod to hide the back.
7. Maintain Your Layered Curtains
To keep your curtains looking fresh, establish a cleaning routine. Sheers typically collect dust quickly and should be vacuumed weekly with a soft brush attachment. Most sheers can be machine-washed on a delicate cycle, but check labels—some require hand washing. Hang them damp to avoid wrinkles, or iron on low heat if needed. Avoid dry cleaning unless necessary.
Blackout curtains often have special coatings that can degrade with harsh washing. Spot clean stains with mild soap and water. Vacuum them monthly to remove dust. If machine washing is allowed, use cold water and gentle cycle, then hang dry; heat can damage the blackout lining. For velvet blackout curtains, steam cleaning is ideal—brush the pile gently after. Acoustic curtains may require professional cleaning to maintain their sound-dampening properties.
Inspect hardware regularly. Over time, rods may sag under the weight of heavy blackout curtains. Tighten brackets and replace worn rings. Rotate your curtains seasonally to even out sun exposure. With proper care, your layered curtain system will remain beautiful and functional for years.